Heads up! Want to manage memberships and charge your users for premium features ?
To manage memberships and create a premium content website, all our themes are compatible with the Paid Memberships Pro plugin. If you haven’t already, we recommend that you install Paid Memberships Pro first.
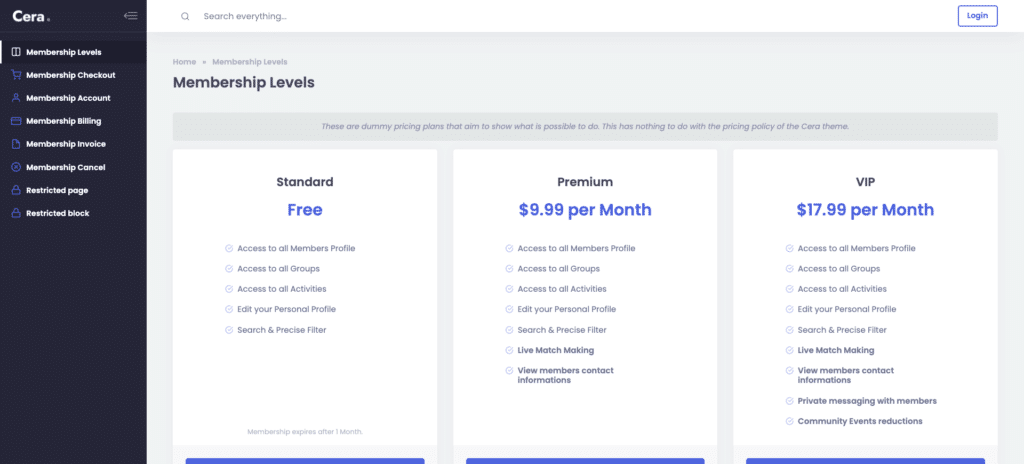
Paid Memberships Pro allows you to create a premium content website, with different membership plans to charge your users for access to your premium features. Thanks to the integration with Paid Memberships Pro that we at Themosaurus have developed for our themes, you can display your memberships levels in a beautiful pricing table.
Want test out these features and see how Paid Memberships Pro integrates with our themes ? Check out our Paid Memberships Pro showcase with the Cera theme !
Want test out these features and see how Paid Memberships Pro integrates with our themes ? Check out our Paid Memberships Pro showcase with the Gwangi theme !
Setting up Membership Levels
Create your pricing table is easy, the first thing you need to do is to create your different pricing plans. Here’s how to proceed :
- From your WordPress Dashboard, go to Memberships > Settings.
- If you didn’t already create a pricing plan, you should see two buttons : “Create Membership Level” and “Video: Membership Levels“. If you want to have a quick guide about membership levels, you can first click “Video: Membership Levels“. Then, just click the “Create Membership Level” button to create your first pricing plan.

Membership Levels settings page - Setup your pricing plan according to your needs. The “description” is the part that will be displayed in each column of the pricing table. We recommend that you make a bullet point list with all the features and perks that come with the membership plan.

Membership Level form - Save your plan by clicking the “Save level” button at the bottom of the page.
- Repeat the operation to create all your pricing plans.
Creating the Pricing Table Page
Now that your pricing plans are all set up, all you need to do is to create your pricing table page. To do that, proceed as follows :
- As before, from your WordPress Dashboard, go to Memberships > Settings.
- Open the “Pages” tab.
- If your Paid Memberships Pro pages aren’t already setup, you should be seeing two buttons : “Generate Pages for Me” and “Create Pages Manually“. We recommend that your press “Generate Pages For Me” as this will setup everything automatically, and you can still edit the generated pages later if you wish.

Pages settings - That’s it ! Now that your pages are generated, you can see your pricing table by visiting the “Levels Page“.

Pages settings with generated pages
Going Further
Installing Paid Memberships Pro
Paid Memberships Pro gives you all the tools you need to start, manage, and grow […]
Limiting Content to Paid Members
With PMPro, you can create some membership levels for your users to buy to access premium content.
Limiting Posts Creation to Paid Members
Heads up! Want to manage memberships and charge your users for premium content ?To manage […]